Waring Pro Waffle Maker Manual: A Comprehensive Guide
This manual details safe operation, cleaning, and troubleshooting for your Waring Pro waffle maker, covering Belgian, mini, and bubble waffle varieties.
Follow instructions carefully!
Welcome to the world of perfectly crafted waffles! Your Waring Pro waffle maker is designed for consistent, delicious results, offering versatility from classic Belgian waffles to fun bubble waffles. This manual provides essential instructions for safe and optimal use.
Before first use, carefully review all safety precautions and familiarize yourself with your specific model’s features; Proper care and maintenance, as outlined within, will ensure years of enjoyable waffle-making experiences.
Enjoy exploring various recipes and techniques!
Understanding Your Model: Identifying Key Features
Your Waring Pro waffle maker boasts several key features for ease of use and superior waffle creation. These include adjustable temperature controls, indicator lights signaling preheating and readiness, and non-stick, triple-coated Whitford plates for effortless release.
Different models – like the WMB400X/800X for mini Belgian waffles and the WBW300X for bubble waffles – offer unique plate designs. Familiarize yourself with your model’s specific plate configuration and measuring scoop details for optimal batter distribution.
Safety First: Important Precautions
Always prioritize electrical safety and prevent burns when using your Waring Pro waffle maker. Return it to an authorized facility for repairs.
Electrical Safety Guidelines
To ensure safe operation, always verify the voltage of your outlet matches the waffle maker’s specifications. Never immerse the appliance in water or other liquids, as this presents a severe electrical hazard. Avoid using extension cords if possible; if necessary, ensure it’s a heavy-duty cord rated for the appliance’s wattage.
Do not operate the waffle maker with a damaged cord or plug. If the appliance malfunctions, disconnect it immediately and seek professional repair. Improper use could result in electric shock or fire. Always unplug before cleaning or storing.
Preventing Burns and Injuries
Exercise extreme caution when operating the Waring Pro waffle maker, as surfaces become very hot during use. Always use oven mitts or heat-resistant gloves when handling the appliance or removing waffles. Avoid touching hot surfaces directly.
Keep children away from the waffle maker during operation and cool-down periods. Never leave the appliance unattended while plugged in. Be mindful of steam escaping during cooking, and avoid direct contact to prevent scalding.

Getting Started: Initial Setup & Use
Begin by unpacking and inspecting your Waring Pro waffle maker. Remove shipping dust by wiping the plates before the first use, following provided instructions.
Unboxing and Inspection
Carefully unpack your Waring Pro Waffle Maker, ensuring all components are present. Verify the unit and its parts – including plates, measuring scoop, and manual – are undamaged. Inspect the power cord for any frays or defects.
Remove all packaging materials, including any protective films or inserts. If any parts are missing or appear damaged, do not operate the appliance. Contact Waring customer support immediately for assistance and potential replacement parts. Thorough inspection prevents potential hazards and ensures optimal performance.
First-Time Cleaning Procedure
Before the initial use, thoroughly clean your Waring Pro Waffle Maker. Wipe the exterior with a damp cloth to remove any dust from shipping. Gently clean the non-stick plates with a soft, damp cloth – avoid abrasive cleaners.
Do not immerse the unit in water. Ensure the plates are completely dry before preheating. This initial cleaning removes any residual manufacturing substances and prepares the waffle maker for optimal, safe performance. This step is crucial for ensuring food safety and longevity.
Preheating the Waffle Maker: Optimal Temperature Settings
Allow your Waring Pro Waffle Maker to preheat fully for even cooking. Plug in the unit and select a temperature setting; setting 4 is recommended for Belgian waffles. The indicator light will signal when preheating is complete.
Optimal temperature ensures crispy waffles. Adjust settings based on desired browning levels. For subsequent waffles, preheating time is reduced. Never leave the waffle maker unattended during preheating or operation.
Making Perfect Waffles: Step-by-Step Instructions
Prepare batter, pour evenly onto the preheated plates, and cook until golden brown. Follow the included recipes for optimal results and delicious waffles!
Batter Preparation: Recipes and Consistency
Achieving the perfect waffle begins with the batter! Utilize the basic Belgian waffle recipe provided, or explore chocolate chip variations for added delight. For Belgian waffles, fill the measuring scoop to the top line indicated on the cup.
Consistency is key: batter should be smooth and pourable, not too thick or thin. Adjust liquid amounts as needed. Proper batter preparation ensures even coverage and golden-brown waffles every time. Experiment with flavorings for unique creations!
Pouring the Batter: Achieving Even Coverage
Carefully pour the prepared batter onto the preheated waffle plates. Aim for even distribution, ensuring the batter reaches the edges without overflowing. Use the measuring scoop to control the amount, preventing messes and ensuring consistent waffle thickness.
Avoid overfilling! This can lead to batter spillage and uneven cooking. A moderate amount provides optimal results. Close the lid gently, allowing the batter to spread naturally. Proper pouring is crucial for perfectly formed waffles.
Cooking Time and Browning Levels
Cooking time varies based on your desired browning level and waffle maker model. Generally, waffles require 3-5 minutes, but monitor closely. Adjust the temperature control for lighter or darker results – higher settings yield quicker, darker waffles.
Indicator lights signal when cooking is complete. Avoid opening the lid prematurely, as this can disrupt the cooking process. Experiment to find your perfect setting for golden-brown, crispy waffles. Preheat on setting 4 for optimal results!

Waffle Varieties: Exploring Different Recipes
Discover diverse waffle options! Enjoy classic Belgian waffles, convenient mini versions (WMB400X/800X), or fun bubble waffles (WBW300X) with this versatile maker.
Classic Belgian Waffles
For authentic Belgian waffles (WW180/WW200 models), utilize the measuring scoop, filling it to the designated top line for Belgian waffle batter. Preheat the Waring Pro waffle maker to setting 4, or your preferred browning level. Pour the batter onto the preheated plates, ensuring even coverage for a perfectly golden waffle.
Cook until steam diminishes, typically 3-5 minutes. Carefully remove the waffle and repeat for additional batches. Experiment with toppings like fresh fruit, whipped cream, and syrup to elevate your Belgian waffle experience. Enjoy a delightful breakfast or dessert!
Mini Belgian Waffles (WMB400X/800X)
When crafting mini Belgian waffles with your WMB400X/800X model, use the measuring scoop, filling it to the lower line indicated on the measuring cup. This ensures perfectly portioned mini waffles. Preheat the maker, then pour batter onto the hot plates, distributing it evenly across each cavity.
Cooking time is typically shorter for mini waffles – around 2-4 minutes. Monitor for golden-brown perfection. These bite-sized treats are ideal for parties or quick snacks. Enjoy with your favorite toppings!
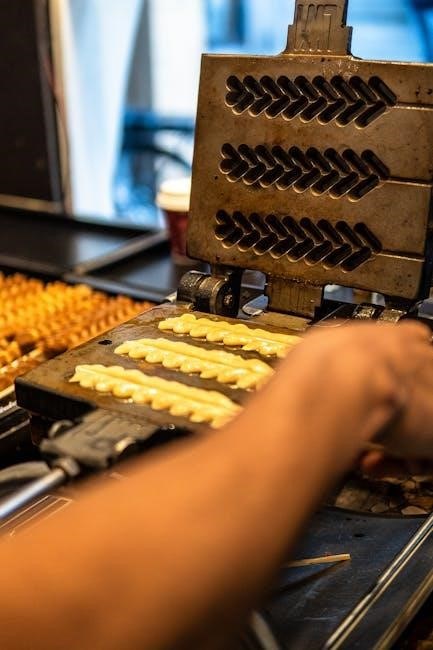
Bubble Waffles (WBW300X)
For delightful bubble waffles using the WBW300X, the batter consistency is key. A slightly thinner batter works best, allowing for the signature bubble formation. Pour enough batter to cover the lower plate, but avoid overfilling.
Cooking time varies, typically 3-5 minutes, until golden and crispy. The unique plate design creates those iconic bubbles. These waffles are fantastic with fresh fruit, whipped cream, and a dusting of powdered sugar – a truly enjoyable treat!

Cleaning and Maintenance: Keeping Your Maker in Top Condition
Regular cleaning extends your Waring Pro waffle maker’s life. Always unplug and cool before cleaning; remove crumbs and batter, then wipe the non-stick plates.
Cooling Down Before Cleaning
Before initiating any cleaning procedure, ensure the Waring Pro waffle maker is completely cooled down and unplugged from the power outlet. This is a crucial safety precaution to prevent severe burns or electrical shock.
Allow ample time for the plates to cool naturally; do not attempt to accelerate the process with water or other cooling agents.
Warm plates can cause immediate injury upon contact.
Proper cooling also prevents damage to the non-stick coating, preserving its effectiveness for future use. Patience is key for safe and effective maintenance.
Removing Excess Batter and Crumbs
After the Waring Pro waffle maker has cooled, gently remove any excess batter or waffle crumbs from the plates. Utilize a soft, dry cloth or a plastic scraper to avoid scratching the non-stick surface. Avoid using abrasive cleaners or metal utensils, as these can compromise the coating’s integrity. Regular removal of debris prevents buildup, ensuring optimal performance and extending the lifespan of your waffle maker. A clean surface promotes even cooking and prevents sticking.
Cleaning the Non-Stick Plates
To clean the non-stick plates of your Waring Pro waffle maker, ensure the unit is cool and unplugged. Wipe the plates with a damp, soft cloth and mild dish soap. Avoid harsh abrasives or scouring pads that could damage the Whitford coating. For stubborn residue, a paste of baking soda and water can be gently applied. Rinse thoroughly with a damp cloth and dry completely before storing. Maintaining the non-stick surface ensures effortless waffle release.
Deep Cleaning Procedures
For a thorough deep clean of your Waring Pro waffle maker, disconnect it and allow it to cool completely. While generally not needed with the non-stick coating, stubborn buildup may require a more intensive approach. Use a slightly damp cloth with mild detergent, avoiding water entering the unit. Never immerse the waffle maker in water. Ensure all soap residue is removed, and dry thoroughly before storage to prevent damage and maintain optimal performance.

Troubleshooting Common Issues
Addressing waffle sticking, uneven cooking, or power problems is crucial. Resetting the unit or checking batter consistency often resolves these common Waring Pro waffle maker issues.
Waffle Sticking to Plates
If waffles persistently stick, ensure the plates are adequately preheated and properly coated. A triple-coated Whitford non-stick surface should prevent adhesion, but occasional sticking can occur. Avoid opening the waffle maker prematurely; allow the waffle to finish cooking.
Insufficient batter or an incorrect batter consistency can also contribute to sticking. Verify you’re using the correct amount of batter per waffle type – Belgian versus mini. Lightly greasing the plates with cooking spray (use sparingly!) may help, though it’s generally not required with a well-maintained unit.
Uneven Cooking
Uneven browning often indicates inconsistent batter distribution. Ensure batter is poured evenly across the waffle plates, reaching all corners. Check the temperature setting; adjustments may be needed for optimal results. A lower setting might be necessary for thinner waffles.
Verify the waffle maker is on a level surface to promote uniform heat distribution. Avoid overcrowding the unit with excessive batter, as this can hinder even cooking. If issues persist, try rotating the waffle maker halfway through the cooking cycle.
Power Issues and Resetting
If the waffle maker fails to power on, first verify the outlet is functioning correctly by testing with another appliance. Ensure the power cord is securely connected to both the waffle maker and the outlet; Check your circuit breaker or fuse box for tripped breakers or blown fuses.
Some models may have a reset button; consult the unit’s base for its location. If problems continue, discontinue use and contact a Waring Authorized Service Facility for assistance. Do not attempt self-repair.

Understanding the Control Panel & Settings
The control panel features temperature adjustment and indicator lights. Lights signal preheating and readiness, ensuring optimal waffle cooking. Adjust settings for desired browning!
Temperature Control Adjustment
Adjusting the temperature is crucial for perfect waffles. Begin with setting 4 for Belgian waffles, modifying to preference. Lower settings yield lighter waffles, while higher settings create darker, crispier results.
Experiment to find your ideal browning level!
Preheating is essential; allow the waffle maker to reach the selected temperature before adding batter.
Consistent temperature ensures even cooking and prevents sticking.
Monitor the indicator lights to confirm readiness.
Remember, different models (WW180/WW200, WMB400X/800X, WBW300X) may require slight adjustments. Refer to the specific recipe guidelines for optimal temperature settings.
Indicator Lights: What They Mean
The Waring Pro waffle maker utilizes indicator lights to signal operational status. A solid “Power” light confirms the unit is receiving electricity. A separate “Ready” light illuminates when the waffle maker has reached the selected temperature, indicating it’s ready for batter.
Flashing lights may indicate an issue, such as insufficient preheating or a potential malfunction. Consult the troubleshooting section if lights behave unexpectedly.
Always ensure the “Ready” light is on before pouring batter to achieve optimal cooking results and prevent sticking. Ignoring these signals can impact waffle quality.

Advanced Techniques & Tips
Enhance waffles with flavorings or create unique shapes! Experiment with batter additions and explore different pouring methods for personalized waffle delights.
Adding Flavorings to the Batter
Unleash your creativity by incorporating diverse flavorings directly into the waffle batter! Consider a dash of vanilla extract for a classic touch, or a sprinkle of cinnamon for warmth. Chocolate chips, blueberries, or even chopped nuts add delightful textures and tastes.
For bolder flavors, experiment with citrus zest, spices like nutmeg, or a tablespoon of cocoa powder. Remember to adjust the liquid content slightly if adding wet ingredients to maintain optimal batter consistency. Always mix thoroughly to ensure even distribution of flavors throughout each delicious waffle!
Creating Unique Waffle Shapes
While your Waring Pro waffle maker is designed for classic shapes, explore creative presentations! Consider using cookie cutters after cooking to fashion fun forms for children, or arranging waffles artfully on a plate.
For a rustic look, intentionally allow batter to overflow slightly during cooking, creating irregular edges. Experiment with different toppings arranged in patterns. Remember safety first – avoid altering the waffle maker itself, focusing on post-cooking presentation for unique waffle experiences!

Warranty Information & Service
Return your Waring Pro waffle maker to an authorized service facility for examination, repair, or adjustment. Avoid using non-recommended attachments!
Waring Authorized Service Facilities
For efficient warranty service or repairs, locate the nearest Waring Authorized Service Facility. Contact Waring’s customer support team to obtain a list of authorized centers in your region.
Ensure you have your model number and proof of purchase readily available when contacting service centers.
Proper packaging is crucial during shipment to prevent further damage.
Waring does not assume responsibility for damage incurred during shipping, so adequate protection is essential.
Always include a detailed description of the issue.
Accessory Attachments: Recommended vs. Non-Recommended
Waring advises against using non-recommended accessory attachments with your waffle maker, as they may cause damage or void the warranty.
Only utilize attachments specifically designed and approved by Waring for your particular model.
Using unauthorized attachments can compromise safety and performance.
Stick to Waring-approved accessories to ensure optimal functionality and prevent potential hazards.
Refer to the manual for a list of compatible attachments, if available.
Recipes Included: A Selection of Waffle Delights
Enjoy classic Belgian and chocolate chip waffle recipes designed for your Waring Pro maker!
Detailed instructions ensure perfect results every time, enhancing your waffle experience.
Basic Belgian Waffle Recipe
Yields: 4 Belgian waffles
Prep time: 10 minutes
Cook time: 3-5 minutes per waffle
Ingredients: 2 cups all-purpose flour, 2 tsp baking powder, ¼ tsp salt, 2 tbsp sugar, 2 large eggs, 1 ¾ cups milk, 6 tbsp melted butter, 1 tsp vanilla extract.
Instructions: Whisk dry ingredients. In a separate bowl, combine wet ingredients. Add wet to dry, mixing until just combined. Fill measuring scoop to the top line for Belgian waffles. Preheat your Waring Pro waffle maker and cook until golden brown. Enjoy immediately with your favorite toppings!
Chocolate Chip Waffle Recipe
Yields: 4 Belgian waffles
Prep time: 10 minutes
Cook time: 3-5 minutes per waffle
Ingredients: Follow the Basic Belgian Waffle Recipe, plus 1 cup chocolate chips. Semi-sweet or milk chocolate work wonderfully!
Instructions: Prepare the Basic Belgian Waffle batter as directed. Gently fold in the chocolate chips. Fill the measuring scoop to the top line for Belgian waffles. Preheat your Waring Pro waffle maker. Cook until golden brown and the chocolate is melted. Serve immediately for a delightful chocolatey treat!
Parts and Accessories: Replacement Options
Genuine Waring replacement plates, triple-coated with Whitford, are available. Measuring scoops and cups can also be replaced, ensuring optimal waffle-making performance.
Waffle Maker Plates: Triple-Coated Whitford
The Waring Pro waffle makers utilize plates featuring a premium, triple-coated Whitford non-stick surface. This robust coating is designed for exceptional durability and effortless food release, minimizing sticking and simplifying cleanup.
These plates are specifically engineered to withstand repeated use and high temperatures, ensuring consistent waffle quality.
Different models, like the WMB400X/800X for mini Belgian waffles and the WBW300X for bubble waffles, have uniquely designed plates.
Regular cleaning is crucial to maintain the non-stick properties and extend the lifespan of these essential components.
Measuring Scoop and Cup Details
Your Waring Pro waffle maker includes a specialized measuring scoop and cup for precise batter portioning. For Belgian waffles (WW180/WW200 models), fill the scoop to the designated line on the cup marked specifically for Belgian waffle batter.
Accurate measurement is key to achieving evenly cooked and perfectly sized waffles.
The scoop’s capacity ensures consistent batter distribution across the plates, promoting uniform browning.
Always use the provided tools for optimal results and refer to the included recipes for specific measurements.

Long-Term Storage: Protecting Your Investment
Proper storage prevents damage. Ensure the waffle maker is clean and dry before storing in a cool, dry place. Avoid stacking heavy items on top!
Proper Storage Techniques
Before long-term storage, thoroughly clean and dry your Waring Pro waffle maker. This prevents residue buildup and potential damage. Ensure the plates are completely cool before initiating the cleaning process. Store the appliance in its original packaging, if available, or a similar protective container.
Avoid storing in damp environments like basements or garages, as moisture can cause corrosion. Keep the unit upright to prevent any lingering batter or crumbs from settling on internal components. Do not wrap the power cord tightly around the appliance, as this can damage the wiring over time;
Preventing Damage During Storage
To safeguard your Waring Pro waffle maker during storage, avoid stacking heavy items on top, which could dent the exterior or damage the non-stick plates. Protect the appliance from extreme temperatures and direct sunlight.
Regularly inspect the power cord for any signs of fraying or damage; a damaged cord poses a safety hazard. If using the original packaging, ensure it remains intact and provides adequate cushioning. Consider using a dust cover to shield the unit from accumulating dirt and debris while in storage.