Welcome to the comprehensive guide for installing your Honeywell Pro 5000 thermostat. This manual provides step-by-step instructions, ensuring a smooth and successful setup. Follow these guidelines carefully to properly connect the thermostat to your HVAC system.
Overview of the Honeywell FocusPRO 5000
The Honeywell FocusPRO 5000 is a non-programmable digital thermostat designed for ease of use and reliable performance. It is compatible with single and dual conventional heating and cooling systems, as well as heat pump configurations. This thermostat offers a straightforward interface, making it simple to set and maintain your desired indoor temperature.
Its primary function is to provide accurate temperature control without the complexity of programmable features, appealing to users who prefer a basic, user-friendly device. The FocusPRO 5000 supports both heating and cooling modes, ensuring year-round comfort.
It typically requires either battery power or a common wire connection for operation, offering flexibility in installation. Known for its dependability and ease of installation, the Honeywell FocusPRO 5000 provides an effective solution for maintaining a comfortable home environment with minimal setup and programming requirements. It is a popular choice for those seeking a reliable and uncomplicated thermostat.
The FocusPRO 5000 is an ideal choice for homes, apartments, and small businesses.
Identifying the Model⁚ TH5xxxD Series

The Honeywell FocusPRO 5000 series includes several models, typically identified by the prefix “TH5xxxD” followed by specific digits. Common models include TH5110D, TH5220D, and TH5320U. Identifying the exact model number is crucial for accessing the correct documentation and ensuring proper installation and setup.
The model number is usually printed on the thermostat itself, often located on the back or side of the unit, or behind the faceplate. The “TH5” designation indicates that it is a Honeywell thermostat, “xxx” represents specific features or capabilities, and “D” often signifies a digital display.
For example, the TH5110D is a basic non-programmable model, while others may include additional features. Confirming the model number allows you to find the correct user manual, installation guide, and troubleshooting resources, ensuring that you follow the appropriate steps for your specific device. This precise identification is essential for a successful installation and optimal performance of your Honeywell FocusPRO 5000 thermostat.
Knowing the exact model ensures access to tailored installation instructions and support.
Preparing for Installation
Before commencing the installation of your Honeywell FocusPRO 5000 thermostat, meticulous preparation is essential. First, gather all necessary tools, including a screwdriver (both Phillips and flathead), a wire stripper, a level, a pencil, and possibly a drill with appropriate drill bits for wall anchors. Ensure you have the correct thermostat wire for any necessary extensions or repairs.
Next, carefully review the existing thermostat wiring to understand the current configuration. Take detailed photos of the wiring connections before disconnecting anything. This visual record will serve as a crucial reference during the new thermostat installation. Check that you have the Honeywell FocusPRO 5000 installation manual at hand, either in print or digital format, for quick access to specific instructions and diagrams.
Verify that the new thermostat is compatible with your HVAC system, whether it’s a conventional heating/cooling system or a heat pump. Confirm that you have all the necessary components included in the thermostat package, such as the wallplate and mounting screws. Finally, ensure you have adequate lighting in the work area to facilitate clear visibility while working with the wiring. Proper preparation minimizes errors.
Securing Power to the HVAC System
The foremost and most critical step in the Honeywell FocusPRO 5000 thermostat installation process is securing the power supply to your HVAC system. This measure ensures your safety and prevents potential damage to the electrical components. Locate the breaker in your electrical panel that corresponds to your HVAC system. If unsure, consult the panel’s labeling or perform a test by switching breakers off one at a time while observing the HVAC unit’s operation.
Once identified, switch the designated breaker to the “off” position. To further confirm that the power is indeed disconnected, test the wires at your old thermostat using a multimeter. Set the multimeter to measure voltage and check for any current between the red wire and a ground wire, or any other wires. A reading of zero volts confirms that the power is safely disconnected.
It’s crucial to emphasize that even though thermostats operate on low voltage (typically 24 volts), working on a circuit without disconnecting the power can still pose risks. If you are uncomfortable or unfamiliar with electrical work, it is highly recommended to enlist the services of a qualified electrician or HVAC technician to perform the installation. Safety should always be the top priority.
Removing the Old Thermostat
With the power safely disconnected, you can proceed to remove your old thermostat. Begin by carefully detaching the thermostat cover from its base. Most thermostats have a simple snap-on or clip-on design. Gently pull the cover away from the wall, taking care not to damage any wires. Once the cover is removed, you will see the wiring connections to the thermostat base.
Before disconnecting any wires, it is extremely important to label each wire with its corresponding terminal on the old thermostat. Use small pieces of masking tape or wire labels to clearly mark each wire. This will be invaluable when connecting the wires to your new Honeywell FocusPRO 5000. A common practice is to note the color of the wire and the terminal it’s connected to (e.g., “Red ⏤ R,” “White ⏤ W,” “Green ⎯ G”).
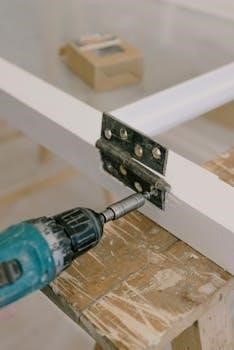
After labeling the wires, carefully disconnect them from the old thermostat terminals. Depending on the thermostat, the wires may be attached with screws, clips, or push-in connectors. Use a small screwdriver to loosen any screws or release any clips. Gently pull each wire straight out from the terminal. Once all the wires are disconnected, remove the old thermostat base from the wall. It is usually held in place by screws.
Wiring the Honeywell FocusPRO 5000
Now that the old thermostat is removed, and the wires are labeled, you can begin wiring the Honeywell FocusPRO 5000. Carefully pull the labeled wires through the opening in the wall plate of the new thermostat. Ensure you have enough slack to easily connect the wires to the terminals without excessive strain.
Refer to the wiring diagram provided in the Honeywell FocusPRO 5000 installation manual. This diagram will show you which wire connects to which terminal on the new thermostat. Match the labels you created earlier to the corresponding terminals on the FocusPRO 5000. For example, if you labeled a wire “Red ⎯ R,” connect that wire to the “R” terminal on the new thermostat.
The Honeywell FocusPRO 5000 uses screw terminals to secure the wires. Loosen the screw on the appropriate terminal, insert the stripped end of the wire into the terminal opening, and then tighten the screw to secure the wire. Ensure the wire is firmly held in place and that no bare wire is exposed outside the terminal.
Repeat this process for each wire, carefully matching the labels to the terminals as indicated in the wiring diagram. Double-check all connections to ensure they are secure and correct. A loose or incorrect connection can prevent the thermostat from functioning properly or even damage your HVAC system.
Connecting Wires to Terminals
With the Honeywell FocusPRO 5000 wall plate securely mounted, the next crucial step involves connecting the thermostat wires to the appropriate terminals. Accuracy is paramount here, as incorrect wiring can lead to malfunction or damage to your HVAC system. Begin by carefully examining the wires you labeled during the removal of your old thermostat.
Each wire corresponds to a specific function within your heating and cooling system. Refer to the wiring diagram included with your FocusPRO 5000 manual. Locate the terminal that matches the label on each wire. For instance, the wire labeled “R” (typically red) usually connects to the power terminal.
Loosen the screw on the designated terminal using a small screwdriver. Insert the stripped end of the wire into the terminal opening, ensuring that only the bare wire makes contact. Avoid inserting any of the wire’s insulation into the terminal.
Once the wire is fully inserted, tighten the screw securely. Give the wire a gentle tug to confirm that it is firmly held in place. Repeat this process for each wire, meticulously matching labels to terminals. Double-check your work against the wiring diagram to minimize errors. Proper connections are essential for the thermostat to control your HVAC system effectively.
Understanding R and Rc Jumper
The “R” and “Rc” terminals on your Honeywell FocusPRO 5000 thermostat manage the power supply for heating and cooling functions. Understanding the jumper between these terminals is crucial for correct operation, especially in systems with one or two transformers.
If your HVAC system has a single transformer powering both heating and cooling, the jumper wire between “R” and “Rc” must remain in place. This jumper ensures that the thermostat can supply power to both systems. Removing it in a single-transformer setup will prevent either heating or cooling from functioning correctly.
However, some systems utilize separate transformers for heating and cooling. In such cases, the jumper wire between “R” and “Rc” should be removed. Leaving it in place with two transformers can create a short circuit or damage the transformers.
To determine whether you have one or two transformers, consult your HVAC system’s documentation or contact a qualified technician. If unsure, it’s generally safer to leave the jumper in place. If the jumper is lost, a small piece of thermostat wire can be used as a replacement. Ensure it makes solid contact with both terminals. Incorrect jumper configuration is a common cause of thermostat malfunctions.
Mounting the Wallplate
After wiring is complete, the next step is mounting the wallplate securely to the wall. Proper mounting ensures the thermostat sits flush and functions correctly. First, detach the wallplate from the thermostat body. Most models have a release mechanism or require gentle pulling to separate the two.
Position the wallplate on the wall at the desired location. Use a level to ensure it’s perfectly horizontal. Mark the locations for the mounting screws through the holes in the wallplate. For drywall, drill 3/16-inch holes at the marked spots. For plaster, use 7/32-inch drill bit;
Insert wall anchors into the drilled holes. These anchors provide a secure grip for the screws, especially in drywall. Align the wallplate with the anchors and drive the screws in until the wallplate is firmly attached to the wall. Do not overtighten, as this may damage the wallplate or the wall itself.
Ensure that the wires are neatly tucked into the wall cavity and are not pinched or damaged during the mounting process. The wallplate should be stable and not wobble. A properly mounted wallplate is essential for the correct installation and operation of your Honeywell FocusPRO 5000 thermostat.
Attaching the Thermostat to the Wallplate
With the wallplate securely mounted and wiring completed, the next step is to attach the thermostat to the wallplate. This process is generally straightforward, but ensuring a proper connection is crucial for the thermostat to function correctly.
Before attaching, double-check that all wires are properly connected to the terminals on the wallplate. Make sure no stray wires are touching each other, as this could cause a short circuit. Gently arrange the wires so they are neatly tucked into the wall cavity, minimizing any obstruction.
Align the thermostat with the wallplate. Most Honeywell FocusPRO 5000 models are designed with a snap-on or hinge-style attachment mechanism. Position the thermostat so that the pins or connectors on the back align with the corresponding slots on the wallplate.
Press the thermostat firmly against the wallplate until you hear a click or feel it securely snap into place. Ensure that all sides are flush and there are no gaps between the thermostat and the wallplate. If your model has a hinge, swing the thermostat down and secure it with the provided screws.
Once attached, gently tug on the thermostat to confirm it is properly secured. A loose connection can lead to intermittent operation or complete failure.
Initial Programming and Setup
After successfully mounting the thermostat, the next crucial step involves initial programming and setup. This stage configures the Honeywell Pro 5000 to work correctly with your specific heating and cooling system. Even though the Honeywell Pro 5000 is labeled non-programmable, it still requires initial setup.
Begin by inserting batteries into the thermostat if they are not already installed. The thermostat typically requires two AA batteries for operation, especially if a common wire is not connected.
Next, consult the Honeywell Pro 5000 installation manual to determine the correct settings for your system type. Access the installer setup menu by simultaneously pressing and holding the fan and up arrow buttons until the display changes.
Navigate through the settings using the up and down arrow buttons, and press “Next” to advance to the next function. Key settings include system type (heat pump, conventional), number of heating and cooling stages, and any specific options related to your HVAC equipment.
Carefully configure each setting according to the manual’s instructions. Incorrect settings can lead to inefficient operation or damage to your system. Once all settings are configured, press “Done” to exit and save the settings. This completes the initial programming, preparing your thermostat for regular use.
Entering Program Mode
The Honeywell FocusPRO 5000, while often described as non-programmable, still requires initial configuration to match your specific HVAC system. Accessing the program mode is essential for setting up these parameters. This initial setup ensures the thermostat communicates correctly with your heating and cooling equipment, optimizing its performance.
To enter the program mode on the Honeywell FocusPRO 5000, simultaneously press and hold the “Fan” button and the “Up” arrow button. Continue holding both buttons until the display changes. This action typically takes a few seconds. The screen will then transition to the installer setup menu, where you can adjust various settings.
Once in program mode, you can navigate through the available options using the up and down arrow buttons. These options include system type, heat stages, cool stages, and other system-specific parameters. Refer to the installation manual for detailed explanations of each setting. Ensure that each parameter is configured correctly for your particular HVAC system.
After making the necessary adjustments, press the “Done” button to save the settings and exit the program mode. Your Honeywell FocusPRO 5000 is now properly configured for initial operation.
Battery Installation and Replacement
The Honeywell FocusPRO 5000 thermostat features battery operation as a backup or primary power source, depending on your system’s wiring. If a common wire (C-wire) is connected from the air handler, the thermostat may not primarily rely on batteries. However, if the common wire is absent, the thermostat will require two AA batteries for normal operation.
To install or replace the batteries, locate the battery compartment on the side of the thermostat. The compartment is designed for easy access without requiring you to detach the thermostat from the wall plate. Gently slide open the battery compartment cover.
Inside the compartment, you will find markings indicating the correct polarity for the batteries (+ and -). Insert two new AA alkaline batteries, ensuring that they are aligned according to the polarity markings. After inserting the batteries, slide the battery compartment cover back into place until it clicks shut.
It’s recommended to replace the batteries annually, even if the low battery indicator is not displayed. This ensures uninterrupted operation and prevents potential issues caused by corroded batteries. When replacing batteries, always use high-quality alkaline batteries for optimal performance and longevity. The thermostat will display a low battery icon when the batteries need replacement. Replacing batteries doesn’t require securing power to the HVAC unit.